
Introduction
A chimney is more than just a passage for smoke; it’s a vital component of your home’s heating and ventilation system. However, many homeowners overlook the importance of chimney caps. Chimney cap installation is not just a cosmetic upgrade—it’s an essential protective measure that preserves your chimney and prevents damage to your home. This comprehensive guide explores everything you need to know about chimney caps, including their benefits, types, installation process, maintenance, and common mistakes to avoid.
What is a Chimney Cap?
A chimney cap is a protective covering installed at the top of your chimney. It is usually made of metal, such as stainless steel, copper, or galvanized steel, and may include a mesh screen that keeps debris and wildlife out while allowing smoke and gases to escape. Installing a chimney cap is a crucial step for homeowners who want to enhance their chimney’s functionality and extend its lifespan.
Why Chimney Cap Installation Matters
Many people underestimate the risks associated with an uncovered chimney. Without a proper chimney cap, your chimney is exposed to:
- Rain and moisture: Water can seep into the chimney structure, causing rust, cracking, and deterioration over time.
- Debris blockage: Leaves, branches, and other debris can obstruct the flue, leading to poor ventilation and potential fire hazards.
- Wildlife intrusion: Birds, squirrels, and other animals may nest in your chimney, creating obstructions or fire risks.
- Downdrafts and smoke damage: A chimney cap can prevent wind from pushing smoke and soot back into your home.
By prioritizing chimney cap installation, homeowners safeguard their property against these common problems, reduce maintenance costs, and improve overall safety.
Types of Chimney Caps
Chimney caps come in various styles, each designed to meet specific needs. Understanding these types will help you choose the right cap for your home.
- Standard Chimney Cap: The most common type, designed to keep out rain and debris while allowing proper ventilation.
- Mesh Chimney Cap: Features a metal mesh around the sides to prevent animals and sparks from escaping. Ideal for wood-burning fireplaces.
- Custom-Fitted Cap: Tailored to match the exact dimensions and aesthetic of your chimney, offering maximum protection and a polished appearance.
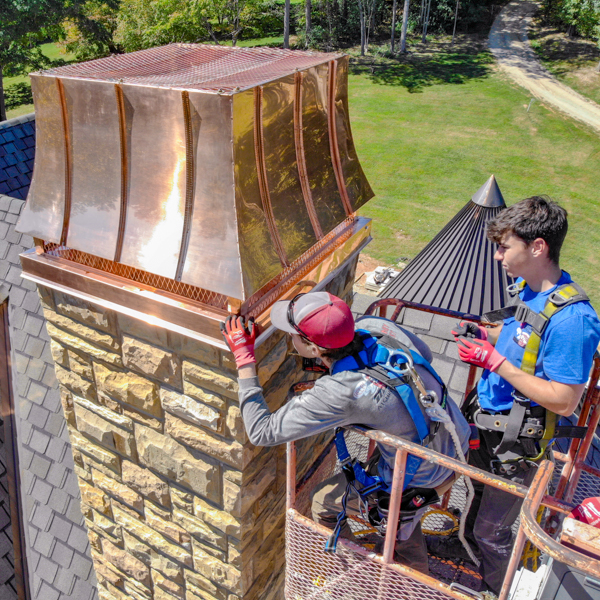
- Copper Chimney Cap: Durable and corrosion-resistant, copper caps provide both functionality and a visually appealing finish.
- Stainless Steel Cap: Known for its strength and resistance to rust, stainless steel caps are a long-lasting choice for harsh climates.
Tools and Materials Required for Chimney Cap Installation
Before attempting a chimney cap installation, gather the necessary tools and materials to ensure a smooth process. These typically include:
- Chimney cap of the correct size and material
- Measuring tape
- Screwdriver or drill
- Screws or mounting brackets
- Ladder
- Safety harness
- Gloves and protective eyewear
- Caulking or sealant (optional, for a watertight seal)
Having all tools on hand reduces interruptions and ensures the cap is installed securely and safely.
Step-by-Step Chimney Cap Installation
Installing a chimney cap may seem daunting, but following these steps ensures a safe and effective process:
Step 1: Measure Your Chimney
Accurate measurements are essential. Measure the length and width of your chimney’s flue to select a properly sized cap. Improper sizing can lead to poor protection or installation difficulties.
Step 2: Choose the Right Cap
Select a cap based on your chimney type, material preference, and specific needs. Remember that a cap with mesh provides additional protection against animals, while solid tops are better for heavy rain.
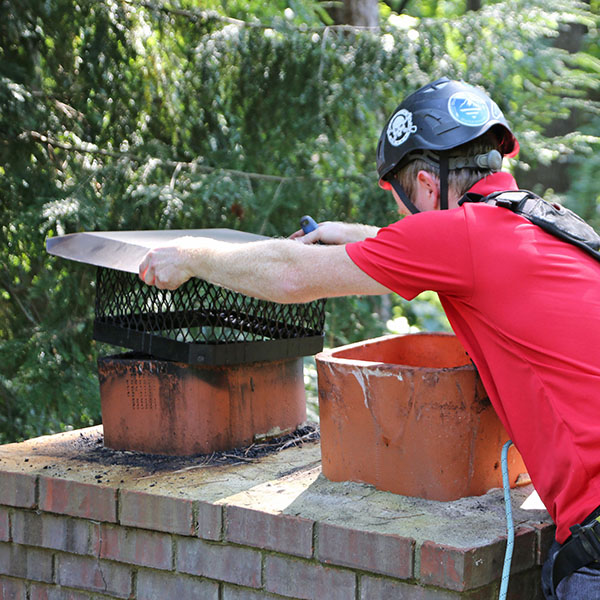
Step 3: Prepare the Chimney Top
Clear any debris or existing obstruction from the chimney crown. If needed, clean the surface to ensure the cap sits flush and stable.
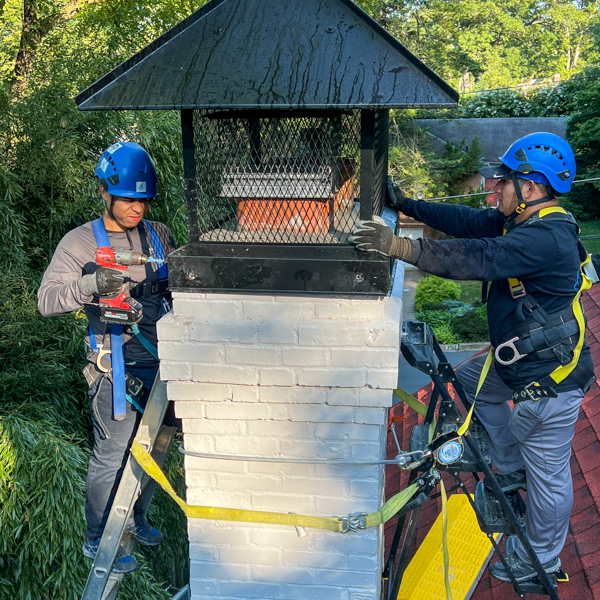
Step 4: Secure the Chimney Cap
Place the chimney cap over the flue and use screws or brackets to secure it in place. Ensure the cap is level and does not wobble. A tightly fitted cap is essential for preventing water and pests from entering.
Step 5: Check for Stability
Gently shake or tap the cap to confirm it is firmly installed. Any loose parts should be adjusted immediately. A secure installation ensures the chimney cap performs effectively over time.
Step 6: Seal if Necessary
For extra protection against water leaks, apply a waterproof sealant around the base of the chimney cap. This is especially useful in areas with heavy rainfall.

Professional vs. DIY Installation
While chimney cap installation can be a DIY project for those with experience and safety knowledge, hiring a professional is often recommended. Professionals bring:
- Expertise in measuring and fitting chimney caps
- Proper safety equipment and training
- Knowledge of local building codes and regulations
DIY installation is possible but requires careful attention to safety, particularly when working at heights. For homeowners without experience, professional installation may save time, reduce risks, and ensure optimal protection.
Benefits of Installing a Chimney Cap
Investing in chimney cap installation comes with multiple benefits:
- Prevents Water Damage: Caps prevent rain and snow from entering the chimney, reducing rust and masonry deterioration.
- Blocks Animals and Debris: Keeps birds, squirrels, and leaves out of your flue.
- Improves Draft and Efficiency: Prevents downdrafts, ensuring proper smoke ventilation.
- Reduces Fire Risk: Spark guards on chimney caps prevent embers from escaping and igniting your roof or surroundings.
- Extends Chimney Lifespan: Protects your chimney structure, minimizing costly repairs in the future.
Maintenance Tips for Chimney Caps
Even after installation, chimney caps require occasional maintenance to remain effective:
- Inspect caps twice a year for rust, damage, or loose fittings.
- Remove debris or leaves that may have accumulated on top of the cap.
- Check the mesh for holes or gaps that could allow pests to enter.
- Clean soot buildup to maintain proper airflow and efficiency.
Routine maintenance ensures your chimney cap continues to protect your home effectively for years to come.
Common Mistakes in Chimney Cap Installation
Avoid these pitfalls during chimney cap installation:
- Choosing the wrong size cap, leading to poor fit and protection.
- Using substandard materials that corrode or fail prematurely.
- Neglecting to secure the cap properly, causing it to blow off in strong winds.
- Ignoring local building codes, which may require specific cap designs for safety.
- Skipping maintenance, which reduces the cap’s effectiveness over time.
By being mindful of these mistakes, homeowners can ensure their chimney remains safe, functional, and durable.
Cost of Chimney Cap Installation
The cost of chimney cap installation varies depending on materials, size, and complexity. On average:
- Basic stainless steel or galvanized caps: $50–$150
- Copper or custom-fitted caps: $150–$500
- Professional installation fees: $100–$300
While costs may seem significant, the protection a chimney cap provides against water damage, fire hazards, and pest infestations often outweighs the initial investment.
How to Choose the Right Chimney Cap
When selecting a chimney cap, consider:
- Chimney Size: Ensure the cap fits snugly over the flue.
- Material Durability: Stainless steel or copper caps last longer in harsh weather conditions.
- Climate Considerations: Areas with heavy rain or snow require waterproof caps.
- Aesthetic Preference: Choose a cap that complements your home’s exterior.
- Budget: Balance cost with quality to ensure long-term protection.
A thoughtful choice ensures your chimney cap not only protects your home but also enhances its overall appearance.

Signs You Need a Chimney Cap
Even if you haven’t installed a chimney cap yet, these signs indicate you need one immediately:
- Water damage or staining on the chimney crown or fireplace.
- Frequent animal intrusion or nests inside the chimney.
- Debris accumulation blocking the flue.
- Downdrafts causing smoke to enter your home.
- Visible deterioration of the chimney crown or masonry.
Addressing these issues promptly through proper chimney cap installation can prevent more severe and costly problems.
Conclusion
Chimney cap installation is an essential step for any homeowner looking to protect their home from water damage, debris, wildlife, and fire hazards. By selecting the right type of chimney cap, installing it securely, and maintaining it regularly, you can extend the lifespan of your chimney and ensure safe, efficient operation. Whether you choose to install the cap yourself or hire a professional, investing in a quality chimney cap is a smart decision that enhances both safety and home value.
Remember, a properly installed chimney cap is more than an accessory—it’s your first line of defense against chimney-related problems. Prioritize your chimney today and enjoy peace of mind knowing your home is well-protected.
Read More:- Stainless Steel Chimney Cap: Durable Protection for Your Home